
As a Project Manager for Clark Remodeling, I’ve learned that homes have a way of telling you when something’s wrong. Sometimes it’s a slow, quiet whisper. That was the case for a homeowner in Raceland this past October. As the crisp autumn light started streaming through their windows at a lower angle, it highlighted something they could no longer ignore: the living room ceiling was noticeably sagging. What had once been subtle waves were now pronounced dips between the ceiling joists, and tiny fastener pops dotted the surface like a faint constellation of trouble.
With the holidays approaching, the thought of hosting family under a ceiling that looked structurally compromised was unsettling. They were looking for more than just a quick patch; they needed a permanent solution and peace of mind. That’s when they called us at Clark Remodeling. They needed an expert opinion on a sagging ceiling repair Raceland homeowners can trust, and our team was ready to help.
Many homes in this part of Raceland are classic 1950s-era Ranch houses, built during a period of rapid suburban expansion. While charming and sturdy, these homes can show their age in unique ways. Decades of Louisiana's persistent humidity, combined with the original construction methods, can put long-term stress on interior finishes. This was exactly the situation we were prepared to investigate.
The Assessment
When I arrived at the single-story brick home, the issue was immediately apparent. The living room ceiling had a distinct “washboard” look, with long, shallow valleys running the length of the room. Using a straight edge, I confirmed the drywall was deflecting by more than half an inch between the joists. This wasn't just a cosmetic issue; it was a sign of systemic failure.
Our initial inspection involved getting into the attic space to check the framing. The ceiling joists were framed at 24 inches on center, a common practice for that era but one that provides less support than the 16-inch spacing often used today. The original drywall was a standard ½-inch sheet, which, over 70 years, had gradually succumbed to gravity and humidity. The original nails had started pulling loose from the joists, creating the “pops” the homeowner had noticed. The drywall’s paper facing was delaminating in a few spots, indicating moisture had been a factor over the years.
Some contractors might suggest a “quick fix” in this scenario - adding screws to pull the old drywall back up and applying a skim coat of joint compound. At Clark Remodeling, we know this approach rarely works. The old drywall has lost its structural integrity; it's fatigued and brittle. Trying to force it flat would likely cause it to crack and would only be a temporary band-aid. The underlying problem of wide joist spacing would remain, and the sag would inevitably return. The only correct and lasting solution was a full ceiling sheetrock replacement combined with a framing correction.
Our Solution
After explaining our findings to the homeowner, we laid out a clear, step-by-step plan that would not only fix the sag but ensure their new ceiling would remain flat and stable for decades to come. Our Clark Remodeling crew was scheduled to begin the following week.
Our process is built around efficiency and minimizing disruption for the homeowner. Here’s how we approached the project:
- Step 1: Meticulous Site Preparation: A full ceiling replacement is inherently messy. Our first priority was protecting the homeowner's property. We carefully moved all furniture out of the room, covered the floors with heavy-duty Ram Board, and sealed off the living room from the rest of the house with plastic dust barriers. This containment is a standard part of our process to keep the client's home as clean as possible.
- Step 2: Demolition and Framing Enhancement: Our crew carefully demolished and removed the old, sagging sheetrock. With the joists exposed, we moved to the most critical step of the project: installing a grid of drywall ceiling rehang with furring strips. We screwed 1x3 wood furring strips perpendicular to the ceiling joists, spaced 16 inches apart. This technique does two crucial things: it creates a perfectly level and flat plane for the new drywall to attach to, and it effectively reduces the span the drywall has to bridge from 24 inches to 16 inches, eliminating the primary cause of the original sag.
- Step 3: Installation of New, Sag-Resistant Drywall: With our new framing grid in place, we were ready for the ceiling sheetrock replacement. We used 5/8-inch sag-resistant ceiling-rated drywall, which is thicker and more rigid than the old material. Using a drywall lift, our skilled installers hung the new sheets, ensuring tight seams and a secure attachment to the new furring strips with modern drywall screws.
- Step 4: A Flawless Finish: This is where craftsmanship truly shines. Our finishing team applied three coats of joint compound, expertly taping the seams and feathering the compound to create a seamless, monolithic surface. We take pride in achieving a Level 5 finish - the highest quality possible - which involves skim-coating the entire ceiling surface to eliminate any imperfections. After a light sanding with a dust-controlled sander, the ceiling was perfectly smooth and ready for paint.
The entire process, from demolition to the final coat of paint, was completed by our team in just four days. We believe in organized workflows that get the job done right without dragging the project on for weeks.
The Results
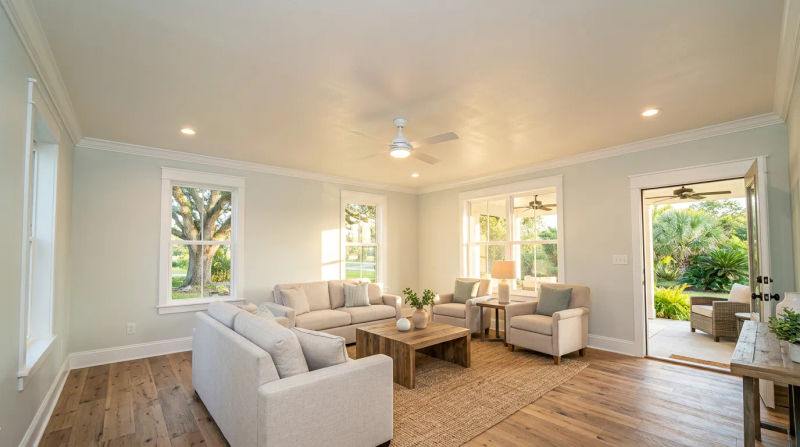
This before and after ceiling repair project was truly transformative. Before, the living room felt dated and neglected, with the wavy ceiling casting uneven shadows and drawing the eye for all the wrong reasons. After our work was complete, the room was completely revitalized.
The new ceiling was perfectly flat, smooth, and bright. It made the entire space feel taller, cleaner, and more modern. The homeowners were ecstatic. They told me they hadn't realized how much the old, sagging ceiling had been bothering them until they saw the finished result. They were particularly impressed with the professionalism of the Clark Remodeling crew and how clean we left their home at the end of each day.
More importantly, they had the peace of mind that comes from a job done right. By installing the furring strips, we didn't just replace a ceiling; we corrected the underlying structural flaw. This solution, a hallmark of the Clark Remodeling difference, ensures they won’t have to worry about sagging, cracks, or nail pops for many years to come. They were able to host their family for the holidays with confidence and pride in their newly updated living space.
This project is a perfect example of why it pays to address the root cause of a problem. A simple patch would have failed within a year or two, but a proper repair provides lasting value and beauty. It’s a testament to our commitment to providing durable, high-quality solutions for our clients.
Ready for your own Clark Remodeling experience? Contact us today for a free inspection.